.jpg?x-oss-process=image/resize,m_pad,w_268,h_160/watermark,type_ZmFuZ3poZW5na2FpdGk,size_10,text_YmxvZy5jcnVkY2xhc3MuY29t,color_ffffff,shadow_0,t_100,g_se,x_10,y_10)
资料来源
{
  "title": "Hexo|Docs",
  "desc": "Fast, concise and efficient blog framework.",
  "logo": "https://hexo.fluid-dev.com/docs/fluid_hexo.png",
  "link": "https://hexo.io/docs/one-command-deployment",
  "background": "#fff"
}{
"title": "Hexo Theme Fluid",
"desc": "Hexo Theme Fluid",
"logo": "https://hexo.fluid-dev.com/docs/fluid_hexo.png",
"link": "https://hexo.fluid-dev.com/posts/actions-deploy/",
"background": "#fff"
}{
"title": "GitHub Pages Quick start",
"desc": "GitHub Pages Quick start",
"logo": "https://avatars.githubusercontent.com/u/93784371?s=40&v=4",
"link": "https://docs.github.com/en/pages/quickstart",
"background": "#fff"
}Environment
Windows
Prerequisite conditions
You need a personal GitHub.
Set up at least one repository with the following requirements:
- Use
username.github.ioas the repository name, replacing "username" with your GitHub username. - The user or organization name must contain uppercase letters, but it must be written in lowercase.
- The repository's visibility should be set to public (Public).
- Use
Refer to the official documentation.
Method One
1. Install hexo-deployer-git in the root directory of your blog Git repository
npm install hexo-deployer-git --save2.Modify the config.yml file in the root directory
deploy:
  type: git # type
  repo: git@github.com:username/username.github.io.git #Warehouse Address
  branch: master # Submitted branch
Attention: 1. I am using the SSH method, not the
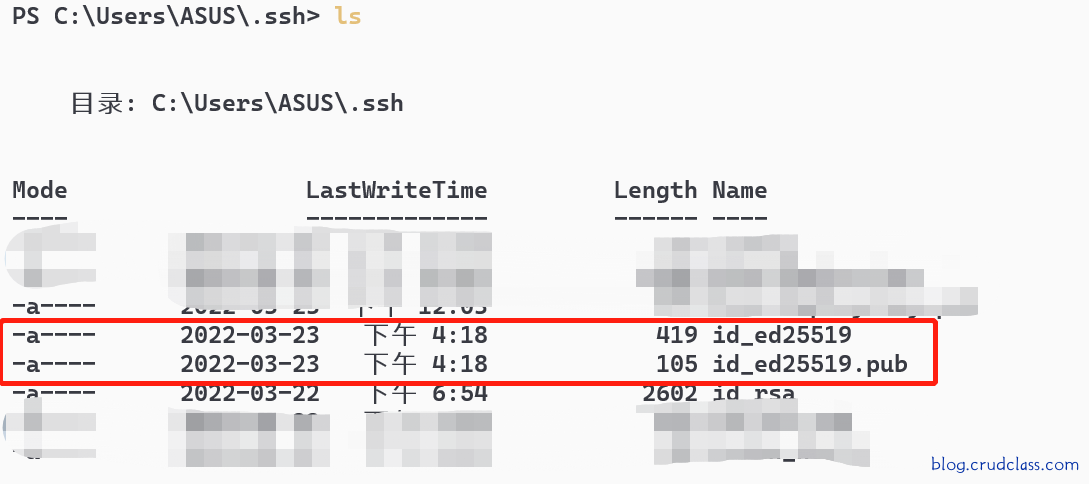
httpsmethod. 2. You need to add a key to your GitHub account. For the way to add it, see Connecting to GitHub with SSH ssh generation method
ssh-keygen -t -C "your_email@example.com"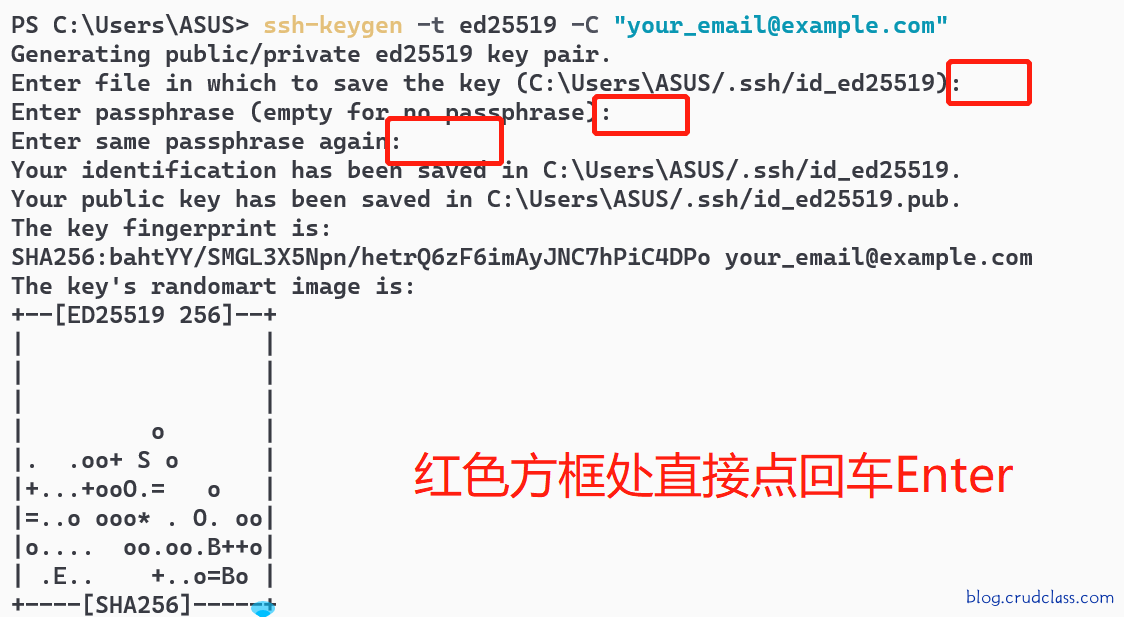
3.Execute these terminal commands
# Clearing the cache prevents the buffer from being committed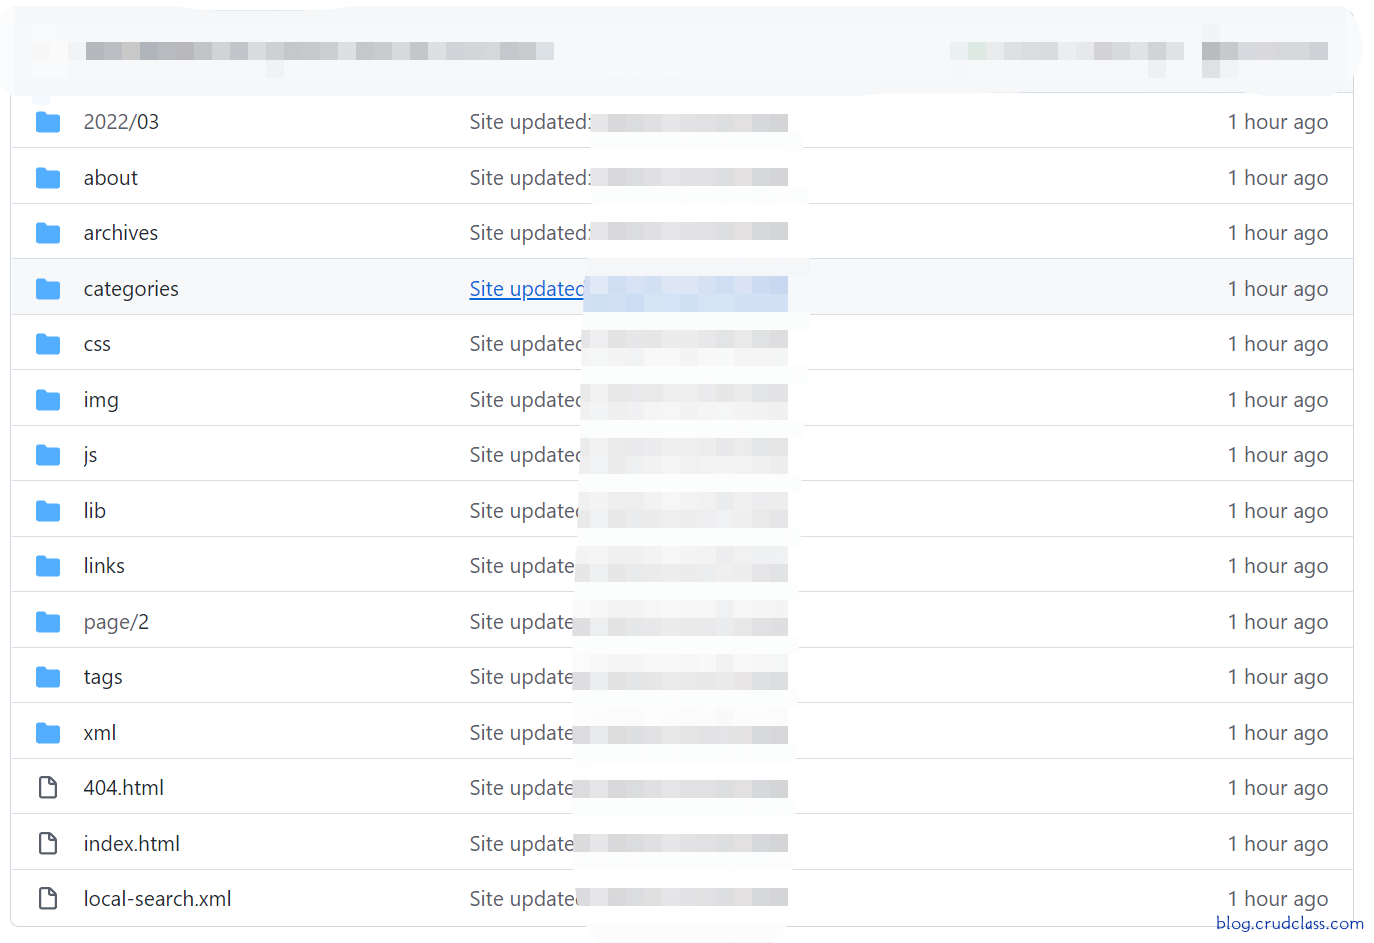
hexo cleanhexo deploy4.Success can be viewed on the GitHub as follows
Using the GitHub Actions automated deployment method
Both this method and the following yml are from Fluid's blog
Uploading the Hexo blog project to GitHub
1.Upload Project to GitHub
2.Setting as below
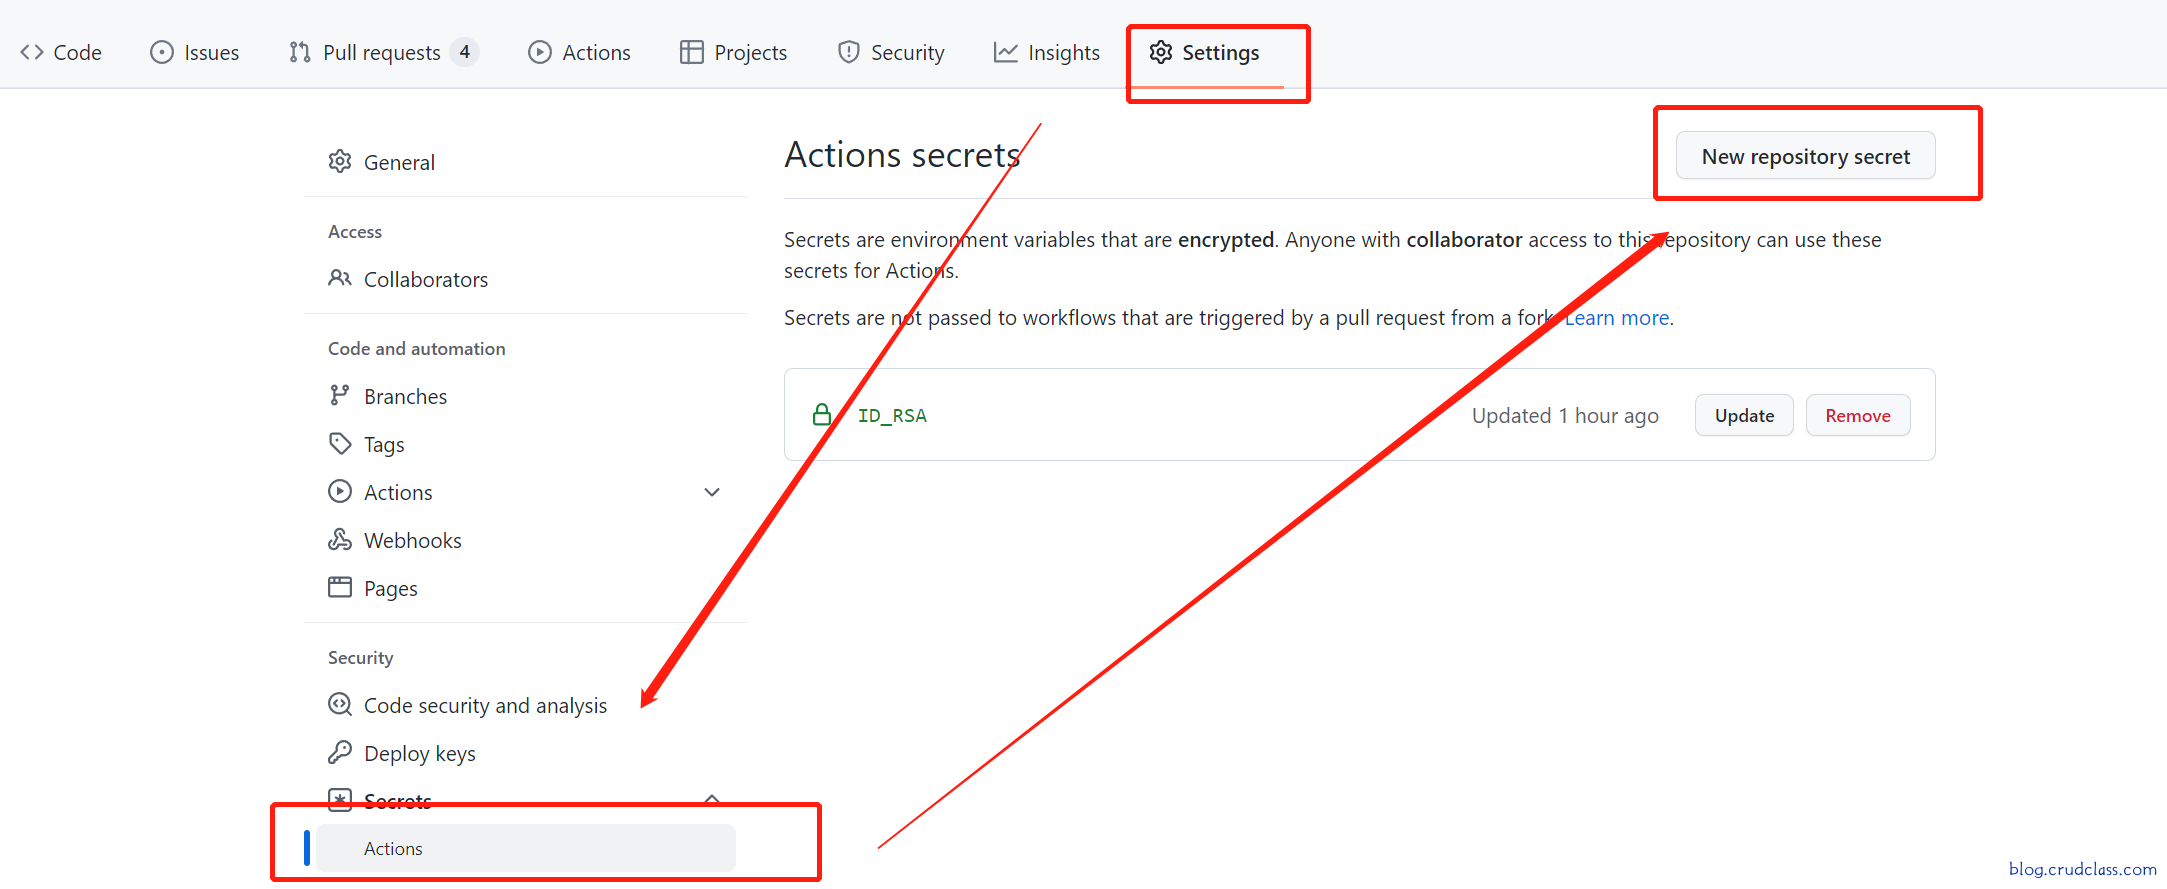
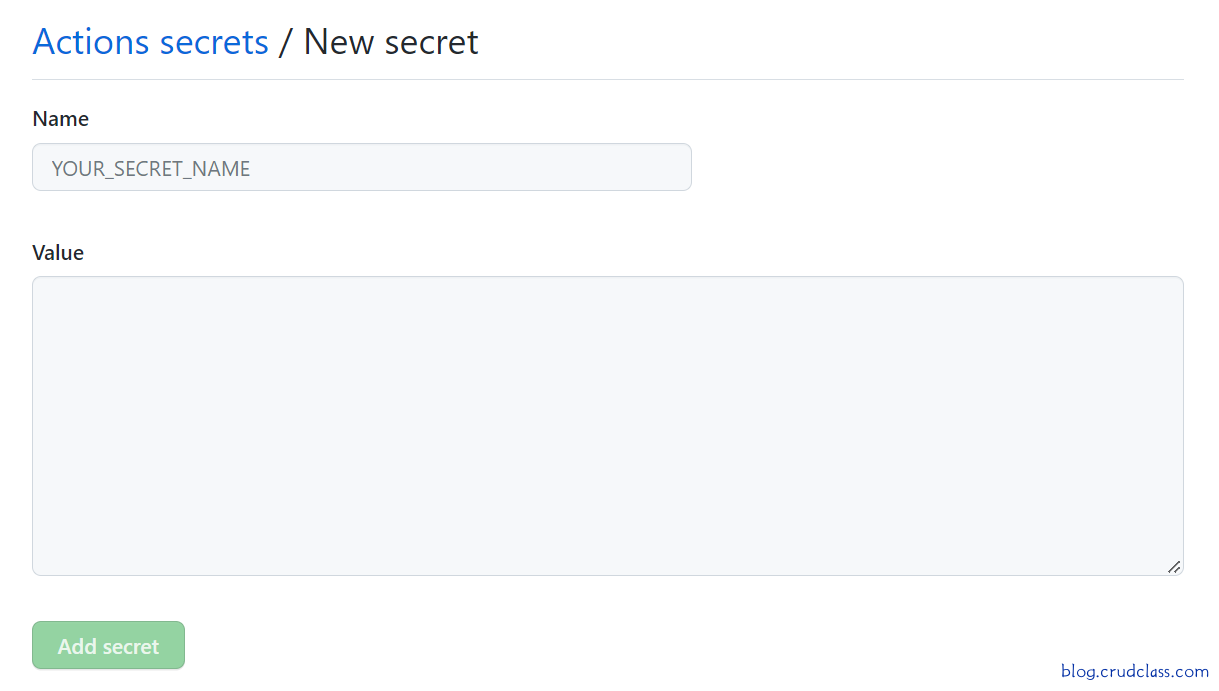
As shown above name English uppercase letters will be converted to uppercase if used in lowercase can be underlined, value Fill in the contents of the above ssh generated file in the not with.pug suffix file, remember name replace SSH_PRIVATE in
${{ secrets.SSH_PRIVATE }}in the following yml with your own
touch ***.yml
Workflow files must be stored in the .github/workflows directory of the repository.
name: Deploy                      # Actions display name, set at will

on: [push]                        # Triggered by listening to the push event

jobs:
  build:

    runs-on: ubuntu-latest

    steps:
    - name: Checkout              # Pulls the specified branch of the currently executing Actions repository.
      uses: actions/checkout@v2
      with:
        ref: master

    - name: Update Submodule      # If there is a submodule in the repository, update it here, if not, delete this step.
      run: |
        git submodule init
        git submodule update --remote

    - name: Setup Node            # Installing the Node Environment
      uses: actions/setup-node@v1
      with:
        node-version: "16.x"

    - name: Hexo Generate         # Installing Hexo dependencies and generating static files
      run: |
        rm -f .yarnclean
        yarn --frozen-lockfile --ignore-engines --ignore-optional --non-interactive --silent --ignore-scripts --production=false
        rm -rf ./public
        yarn run hexo clean
        yarn run hexo generate

    - name: Hexo Deploy           # Here's an example of a hexo deploy.
      env:
        SSH_PRIVATE: ${{ secrets.SSH_PRIVATE }}
        GIT_NAME: yourname
        GIT_EMAIL: your@email.com
      run: |
        mkdir -p ~/.ssh/
        echo "$SSH_PRIVATE" | tr -d '\r' > ~/.ssh/id_rsa
        chmod 600 ~/.ssh/id_rsa
        ssh-keyscan github.com >> ~/.ssh/known_hosts
        git config --global user.name "$GIT_NAME"
        git config --global user.email "$GIT_EMAIL"
        yarn run hexo deploy
注意:上面yml中node版本可以根据自己环境中的版本更换我的是16的版本所以换成了16。
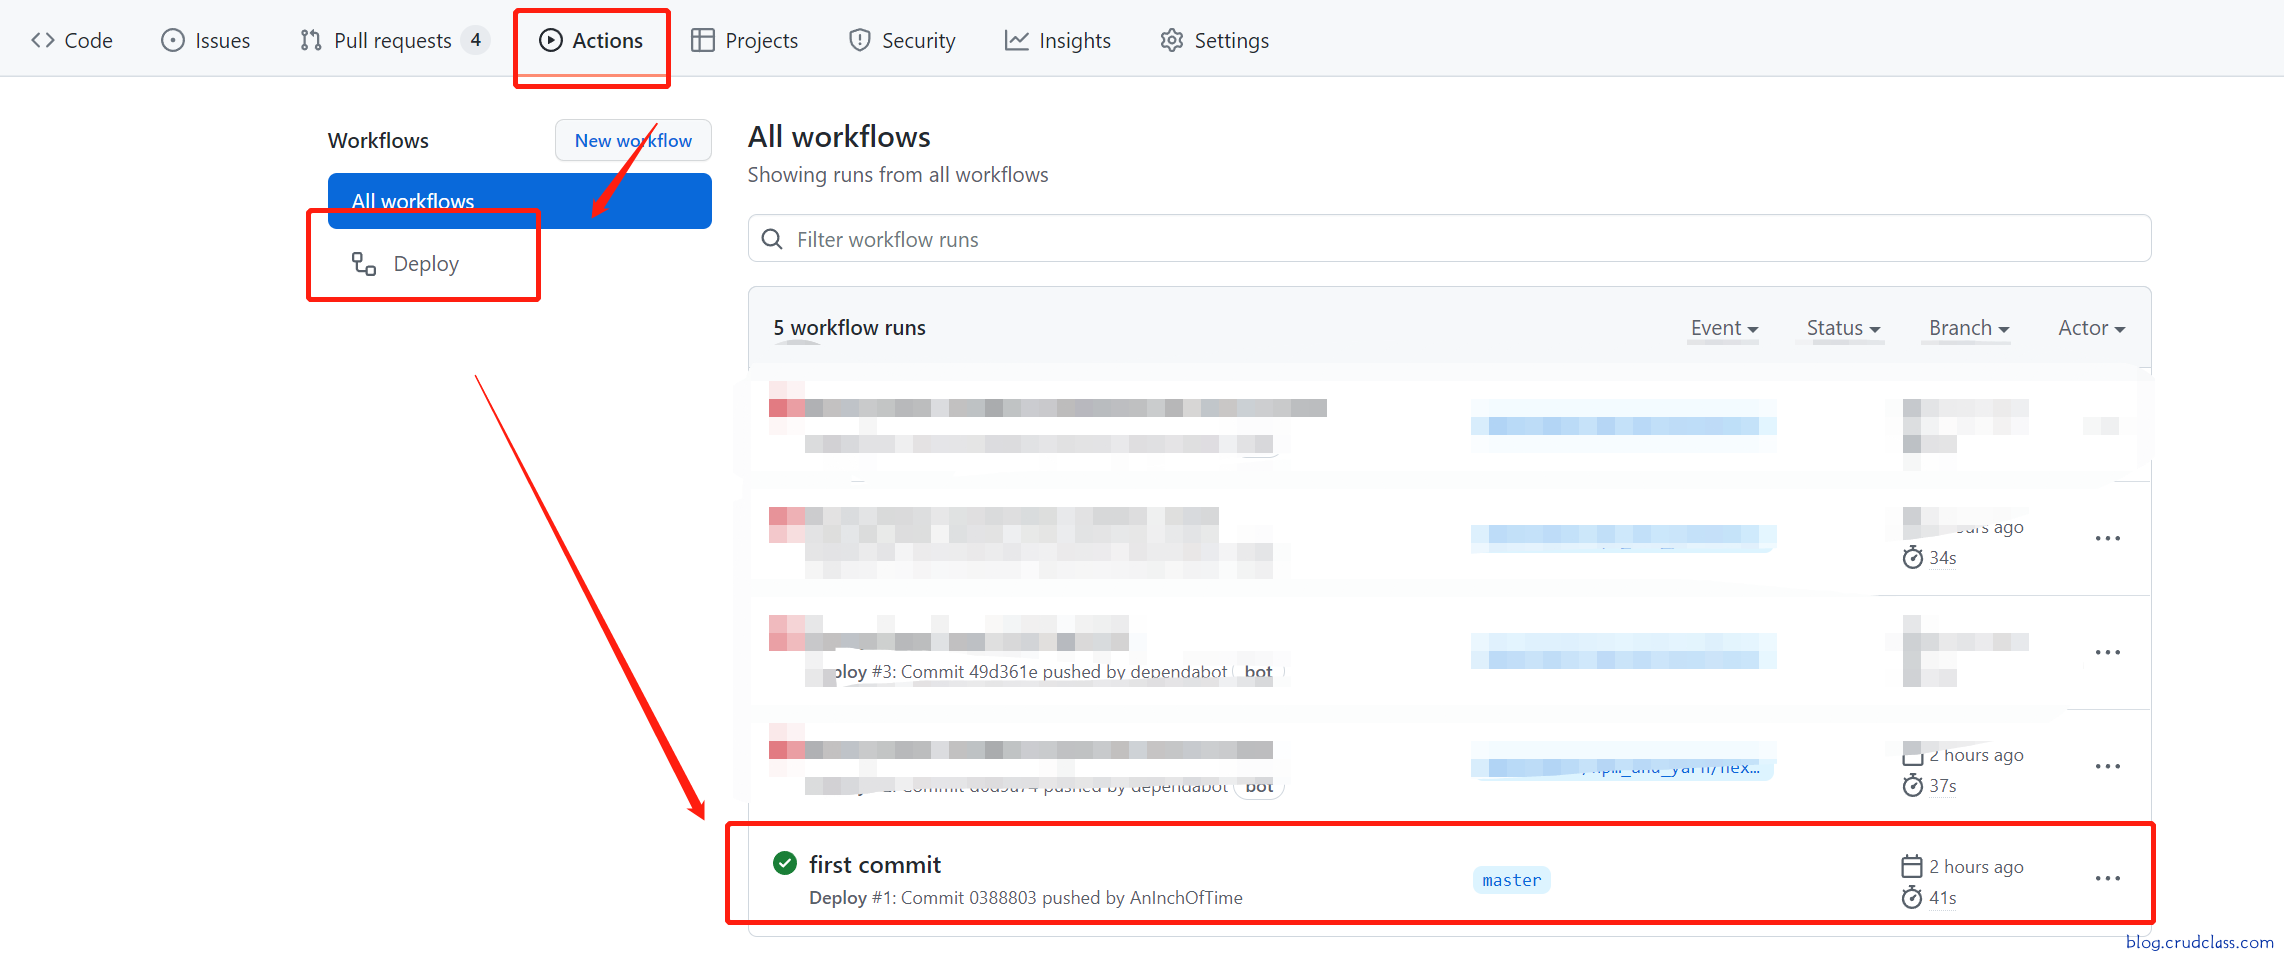
Push Code
Each push to github pushes the code to the specified branch of the username.github.io repository via github actions If it fails, you can click Action to see why it failed.
Click on it to see what went wrong
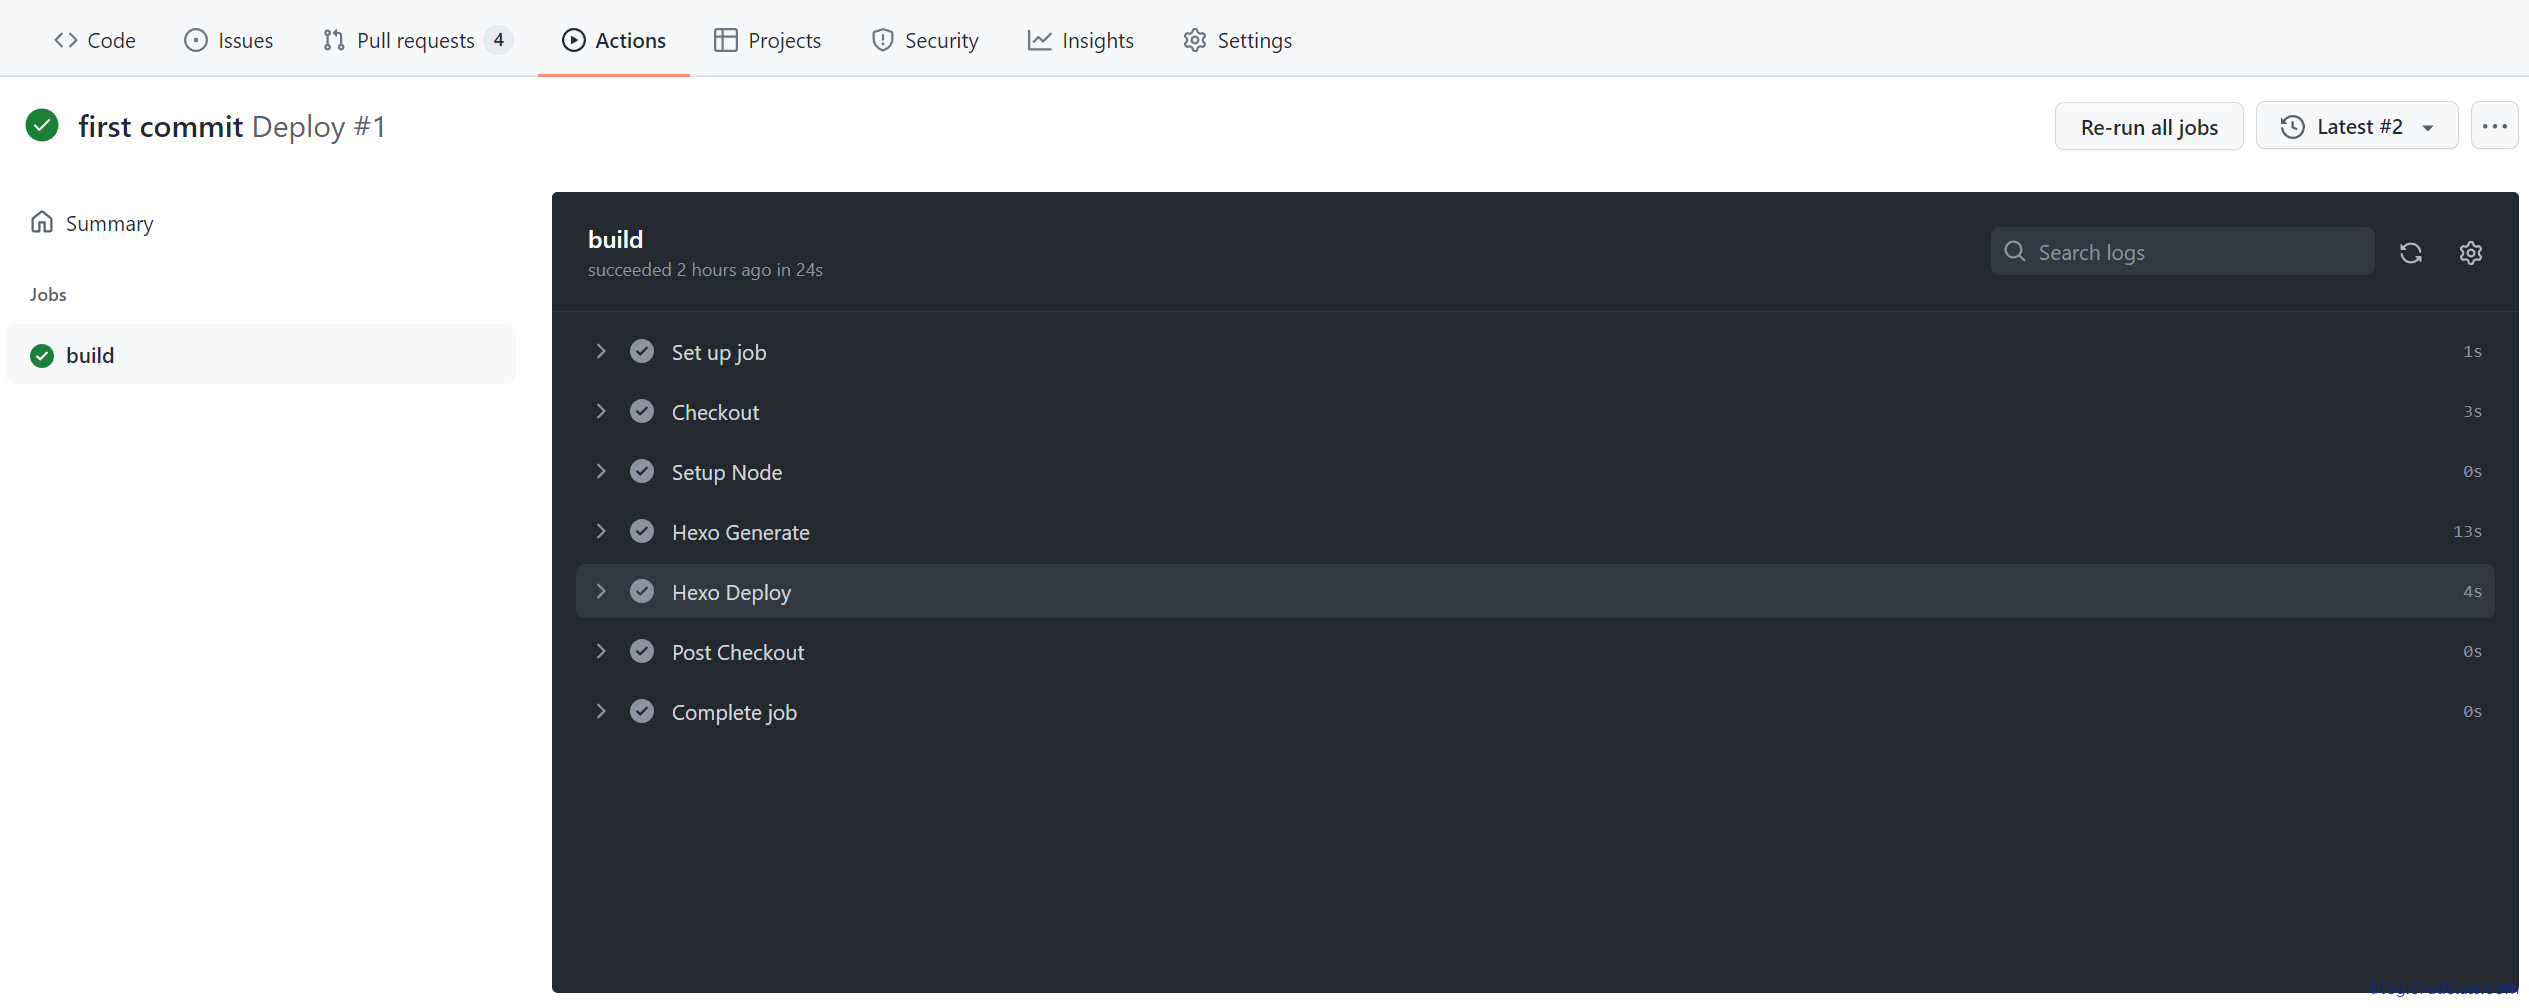
Note: The problem may be with
Hexo Deployto see if your repository setting->secrets->Actions->Actions secrets are correct.
concluding remarks
You can first successfully upload and access 'username.github.io' through method 1, and then use method 2, there is a delay of up to 20 minutes after the upload is successful
Of course, you can also perform the above operations under different branches of the same repository, because the 'username.github.io' library is public, so it is not recommended to do so
With some changes in config.yml.
## Set your site url here. For example, if you use GitHub Page, set url as 'https://username.github.io/project'
url: https://aninchoftime.github.io
permalink: :year/:month/:day/:title/
permalink_defaults:
pretty_urls:
  trailing_index: true # Set to false to remove trailing 'index.html' from permalinks
  trailing_html: true # Set to false to remove trailing '.html' from permalinks

# Deployment
## Docs: https://hexo.io/docs/one-command-deployment
deploy:
  type: git
  repo: git@github.com:AnInchOfTime/aninchofTime.github.io.git
  branch: master